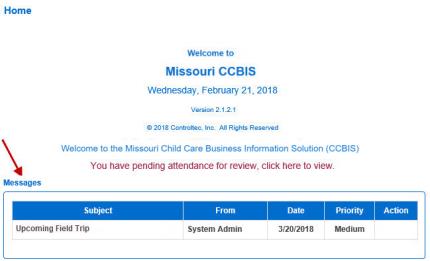
Depending on the Site Settings, upon initial login, if the Operator has any unread messages, they will be visible in the Home page.
To open, hover over and click on the Subject of the message you would like to view. Once opened, the message will disappear from the Home Page.
To access the Message Center and view all messages, click on the envelope icon  on the Navigation Bar.

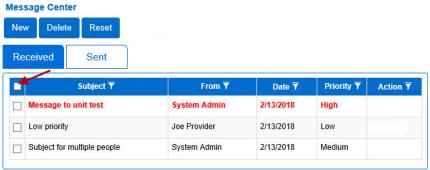
KinderConnect displays a list of all the messages you have received. All unread messages appear in bold letters. All unread high priority messages appear in bold red letters.
The upper buttons identify the actions that can be taken
The icons  next to the titles of the column headers allow you to enter filters to sort your messages by:
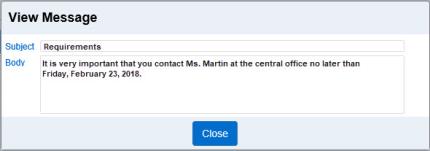
To open a message to view, hover over and click on the Subject line. Once done, press Close to return to the Message Center. The message you just viewed disappears from the home page.
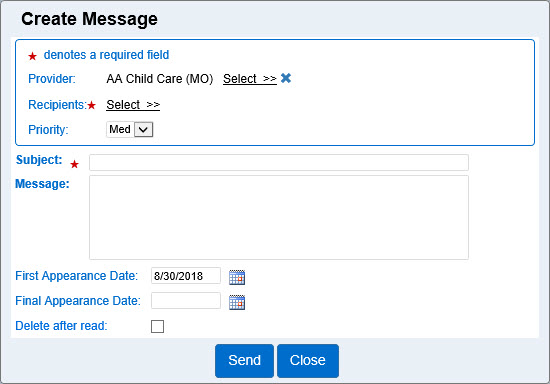
To create a new message, from the Message Center, press New. It is also possible to click  to the right of the Navigation Bar to create a new message. Note that sending and receiving messages is permission based, therefore not all operators can create and send messages.
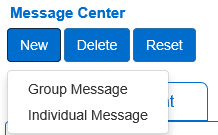
Click to select whether you would like this message to be a Group Message or an Individual Message.
If selecting to create a Group Message:
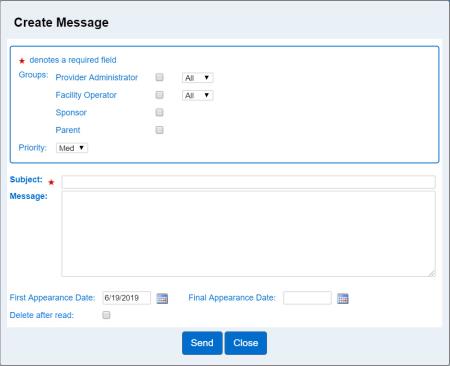
Click on the appropriate checkbox(es) to select the recipients of this message.
If selecting to create an Individual Message:
| Field | Description |
|---|---|
| Provider |
Select the name of the Provider(s) you are associated with to whom you would like to send the message. |
| Recipients |
Press Select >> to open the User Selector. Enter the First and/or Last Name of the person(s) you would like to send the message to, and/or press the drop-down arrow on the Category field to filter by a specific user type, then press Search. In the Search Results, click on the check boxes corresponding to the names you would like to select, then press Add to continue. When selecting the name(s), note that all individuals added using the selector are included in any list of recipients that already exists. For example, when you locate and add a recipient, then return to the User Selector and find others, KinderConnect adds them to the list instead of overriding the recipient(s) you already selected. To clear the list, press Clear Recipients List and start again. |
| Priority | Press the drop-down arrow to select the type of urgency of your message. |
| Subject | Enter the subject of the message. |
| Message | Enter the text of the message. |
| First Appearance Date | Enter the date, or use the Calendar button to select, when the message will first appear in the list of Received messages of the recipient. |
| Final Appearance Date | Enter the date, or use the Calendar button to select, when the message will last appear in the list of Received messages of the recipient. |
| Delete After Read | Click on this check box to indicate that you would like the message to be removed from the recipient's inbox after it is read. |
Once you finish writing your message, press Send.
Note: When creating a New message and using any of the Select >> options, KinderConnect deactivates the Send and Close buttons to prevent you from accidentally pressing them before you complete your selections.
It is possible to Delete messages from the lists and to Reset to the original Unread status.
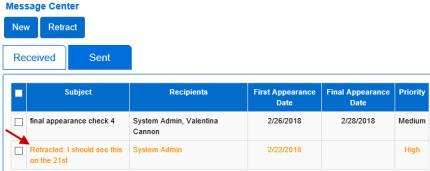
You can retract messages that you have sent from Received messages as long as the Recipient has not accessed the Message Center page after it was delivered.
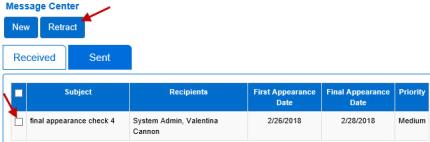
Note: Retracting a message does not guarantee it will not be delivered. The Recipient will be able to see it if already in the Messages page when retracted.
Providers using API will receive a message notifying them when transferred attendance cannot be saved.
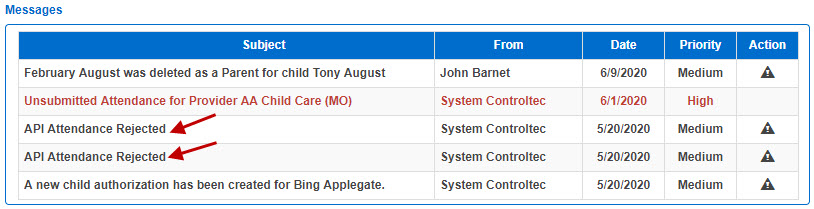
If attendance was already uploaded and the API attempts to modify the existing attendance records with different In and Out times, the attendance will be rejected. Clicking on the Action column link corresponding to the message will take the user to the Attendance > Rejections page where the details of the attendance that was rejected can be reviewed.